Open Computer Vision(opencv)
OpenCV was started at Intel in 1999 by Gary Bradsky and the first release came out in 2000. Vadim Pisarevsky joined Gary Bradsky to manage Intel’s Russian software OpenCV team. In 2005, OpenCV was used on Stanley, the
vehicle who won 2005 DARPA Grand Challenge. Later its active develop-ment continued under the support of WillowGarage, with Gary Bradsky and Vadim Pisarevsky leading the project. Right now, OpenCV supports a lot of algorithms related to Computer Vision and Machine Learning and it is expanding day-by-day.Currently OpenCV supports a wide variety of programming languages like C++, Python, Java etc and is available on
different platforms including Windows, Linux, OS X, Android, iOS etc. Also, interfaces based on CUDA and OpenCL are also under active development for high-speed GPU operations.OpenCV-Python is the Python API of OpenCV. It combines the best qualities of OpenCV C++ API and Python language.
openCV with python
Python is a general purpose programming language started by Guido van Rossum, which became very popular in short time mainly because of its simplicity and code readability. It enables the programmer to express his ideas in fewer lines of code without reducing any readability.Compared to other languages like C/C++, Python is slower. But another important feature of Python is that it canbe easily extended with C/C++. This feature helps us to write computationally intensive codes in C/C++ and create
a Python wrapper for it so that we can use these wrappers as Python modules. This gives us two advantages: first,our code is as fast as original C/C++ code (since it is the actual C++ code working in background) and second, it is very easy to code in Python. This is how OpenCV-Python works, it is a Python wrapper around original C++ implementation.
And the support of Numpy makes the task more easier. Numpy is a highly optimized library for numerical operations.It gives a MATLAB-style syntax All the OpenCV array structures are converted to-and-from Numpy arrays. Sowhatever operations you can do in Numpy, you can combine it with OpenCV, which increases number of weapons in your arsenal. Besides that, several other libraries like SciPy, Matplotlib which supports Numpy can be used with this.So OpenCV-Python is an appropriate tool for fast prototyping of computer vision problems.
Before starting these should be installed
- OpenCV :
- I have installed openCV 2.4.9 on my Ubuntu 14.04.If you with other operating system follow according to it.
- link for installation of openCV 2.4.9 on ubuntu 14.04
- Python:
- If not installed python 2.4.x. follow the link and install python 2.4+.x
Getting started with Images
you will learn how to read,display and save the image.
- Read image:
- Use function cv2.imread().
- cv2.IMREAD_COLOR : Loads a color image. Any transparency of image will be neglected. It is the default
flag. - cv2.IMREAD_GRAYSCALE : Loads image in grayscale mode.
- cv2.IMREAD_UNCHANGED : Loads image as such including alpha channel.
- cv2.IMREAD_COLOR : Loads a color image. Any transparency of image will be neglected. It is the default
- Use function cv2.imread().
- Display image:
- Use function cv2.imshow().
- Note: Give different names for windows.
- Use function cv2.imshow().
- Write image(save image):
- Use function cv2.imwrite().
Follow this simple python program to understand above functions
import numpy as np
import cv2
img1 = cv2.imread(‘abd.jpg’,1) #for coloured image you can use 1
img2 = cv2.imread(‘abd.jpg’,0) #for grey-sacle image you can use 0
img3 = cv2.imread(‘abd.jpg’,-1) #for unchanged image you can use -1
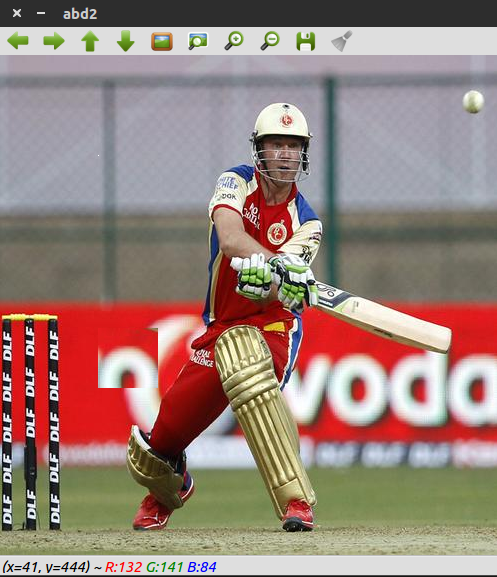
cv2.imshow(‘abd2’,img1)
cv2.imshow(‘abd1’,img2)
cv2.imshow(‘abd3’,img3)
cv2.waitKey(0) #wait until esc key is pressed
cv2.destroyAllWindows() #to destroy all the windows created
output:


Basic operation on image
you will learn
- Accessing pixel values and modifying them.
- Access image properties.
- Setting Region of Image (ROI).
- Splitting and Merging images.
As you know image is matrix. you can access the RGB values by specifying row and column values of the matrix.
Image properties include number of rows, columns and channels, type of image data, number of pixels etc.Shape of image is accessed by img.shape. It returns a tuple of number of rows, columns and channels (if image is color):
Sometimes, you will have to play with certain region of images. For eye detection in images, first perform face detection over the image until the face is found, then search within the face region for eyes. This approach improves accuracy (because eyes are always on faces 😀 ) and performance (because we search for a small area).ROI is again obtained using Numpy indexing. Here I am selecting the ball and copying it to another region in the image:
let’s load the image,
import numpy as np
import cv2
img = cv2.imread(‘abd.jpg’,1)
px = img[100,100]
print px
# accessing only blue pixel similarly 1-red,2-green
blue = img[100,100,0]
print blue
#modifying the pixel values
img[100,100] = [255,255,255]
print img[100,100]
#image properties
print img.shape #dimensions of image
print img.size #number of pixels
print img.dtype #image data type obtained
#ROI
window = img[280:340, 330:390]
img[273:333, 100:160] = window
#spliting and merging
b,g,r = cv2.split(img)
img = cv2.merge((b,g,r))
cv2.imshow(‘abd2’,img)
cv2.waitKey(0)
cv2.destroyAllWindows()
output:
[177 165 165]
177
[255 255 255]
(500, 500, 3)
750000
uint8
init done
opengl support available
Arithmetic Operations on Images
You will learn several arithmetic operations on images like addition, subtraction, bitwise operations etc.
- You will learn these functions : cv2.add(), cv2.addWeighted() etc.
Image addition
You can add two images by OpenCV function, cv2.add() or simply by numpy operation, res = img1 + img2.Both images should be of same depth and type, or second image can just be a scalar value.
x = np.uint8([250]) y = np.uint8([10])
print cv2.add(x,y) # 250+10 = 260 => 255
print x+y
Imange Blending
This is also image addition, but different weights are given to images so that it gives a feeling of blending or transparency. Images are added as per the equation below:
g(x) = (1 − α)f 0 (x) + αf 1 (x)
By varying α from 0 → 1, you can perform a cool transition between one image to another.
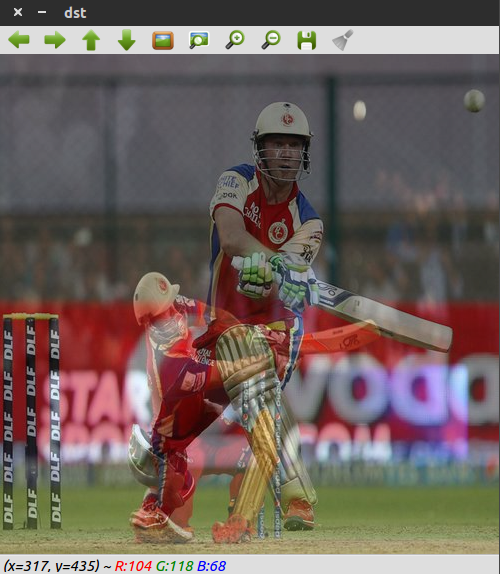
Here I took two images to blend them together. First image is given a weight of 0.7 and second image is given 0.3.
cv2.addWeighted() applies following equation on the image.
dst = α · img1 + β · img2 + γ Here γ is taken as zero.
import cv2
img1 = cv2.imread(‘abd.jpg’)
img2 = cv2.imread(‘abd1.jpg’)
dst = cv2.addWeighted(img1,0.7,img2,0.3,0)
cv2.imshow(‘dst’,dst)
cv2.waitKey(0)
cv2.destroyAllWindows()
input images


output image